I run a local Gopher server on a System 7.5.3 and wanted to be able to make a screenshot of that server desktop (which displays the connections log) from a connected client, then make these screenshots available to the client to download.
Apart from Applescript this tutorial requires no coding skills (I have none), it just needs to a few applications set up correctly.
It works on System 7.5.3 and 7.6.1. Works on Mac OS 8 - 9 too, but Applescript has been different on there, so the script needs a different syntax.
Software needed :
- KeyQuencer 2.5.5 Lite. A keys macro editor that can save any kind of key-shortcut to be used in an Applescript script.
- QuickTime 4.0.3. Or any version that includes PictureViewer and is registered to export images in jpeg.
- Applescript. Should be installed by default. To make the script that will trigger the screenshot, save it, and place it where we want.
- ToolDaemon 2.5. Used to launch the script remotely. It’s the only telnet server for System 7 to Mac OS 9. Gives you a command line access via any telnet client.
First things first, the problem with screenshots in Mac OS. By default the shortcut CMD-Shift-3 creates an image file called “Picture 1“ at the root of the startup HDD. Each subsequent new screenshot is then named sequentially "Picture 2", 3, 4... etc.
So if one wants to tidy up his HDD and move existing screenshot to another folder (say an « Images » folder ), each new screenshot image file will start to be named again "Picture " then 2, 3. Moving these new files into the "Images" folder will conflict with existing ones, and Mac OS will be asking us if we want to replace them with the new identically named ones. Not what we want.
Ideally, we want something that triggers the CMD-Shift-3 screenshot, renames the image with a unique name, say the hour/min/sec of the day, and then place it in the images folder.
KeyQuencer
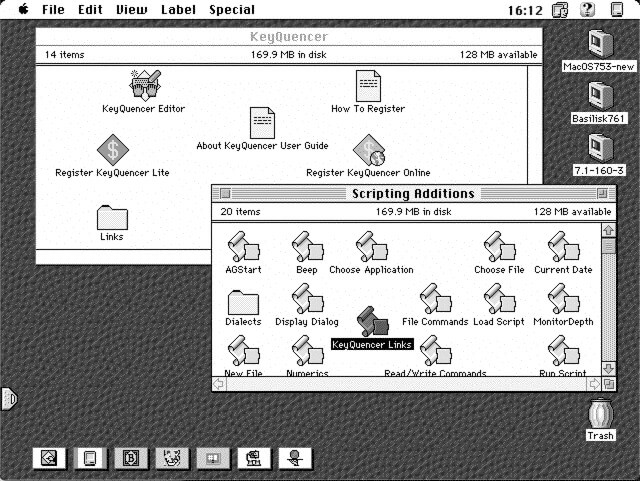
Let’s start by installing KeyQuencer 2.5.5 lite. It will ask to reboot after install. Once rebooted, the KeyQuencer folder is on our HDD. Check inside the "KeyQuencer Links" folder and drag it in the Scripting Additions folder present in the Extensions folder of our System Folder. Like in this screenshot:
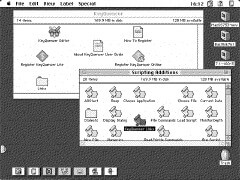
(click to enlarge)
Note: Depending on the system we install it on, the installer will do that for us, and the “KeyQuencer Links“ file will already be there after the installation. In case it is not, do it manually as described above.
What does it do? "KeyQuencer Links" allows Applescript to call for KeyQuencer shortcuts Macros.
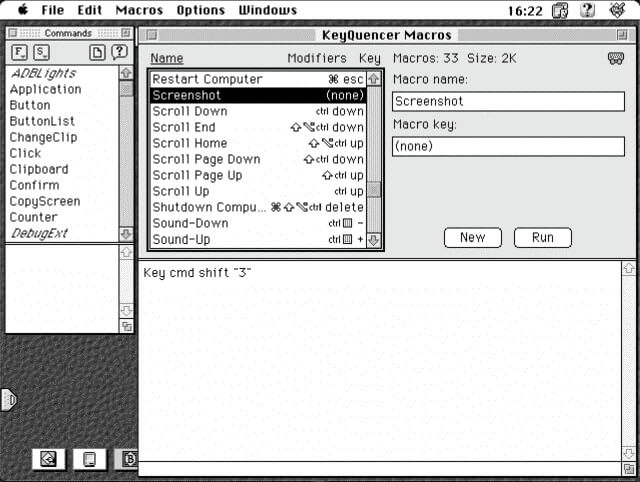
Now open the KeyQuencer Editor, and create a new Macro. Name it « Screenshot » and leave the Macro key to none (we don’t need a new shortcut for screenshots, we just need Applescript to be able to call the default screenshot shortcut). Type into the command field Key cmd shift ”3”, which is the standard command Applescript will ask KeyQuencer to do for us.
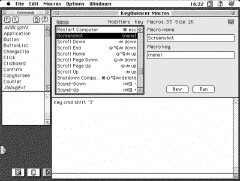
(click to enlarge)
For a test, click the “run“ button. It should create a screenshot named “picture 1“ on your Mac HDD. If all works fine, save and quit.
QuickTime
Another problem with MacOS screenshots is that they are saved in Apple's old PICT format. Not very common nowadays. So it would be best if we could save these screenshots as jpeg by default.
For that, let’s install QuickTime 4.0.3 ( I chose that version because it is the last that runs on 68k System 7 Macs. Later versions may work fine too). We’ll need to register Quicktime for it to be able to export images to jpeg.
Once done and rebooted, we have a "QuickTimeTM Folder" on our MacHDD. Let’s move it to the Applications folder (if you don't have one, it's good time to create one and move your apps in there - easier way to know what is where when time comes to point to it in AppleScript).
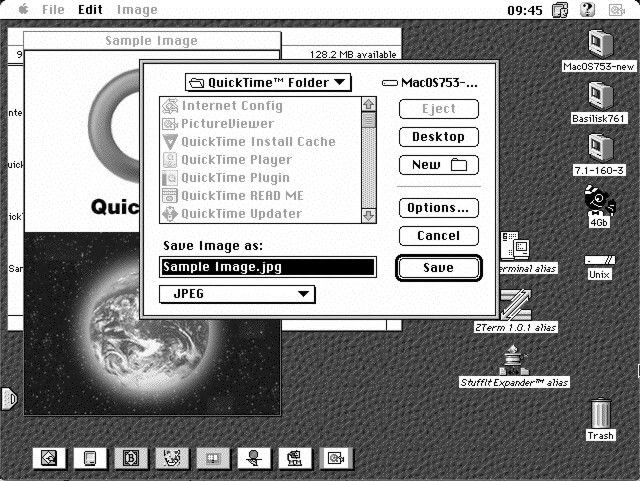
Next setup QuickTime for exporting an image to jpeg by default. Launch the Picture Viewer application within the Quicktime folder and open the Sample Image present in the QuickTime folder. Then go to File -> Export , and select JPEG at the bottom of the export window :
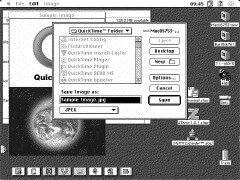
(click to enlarge)
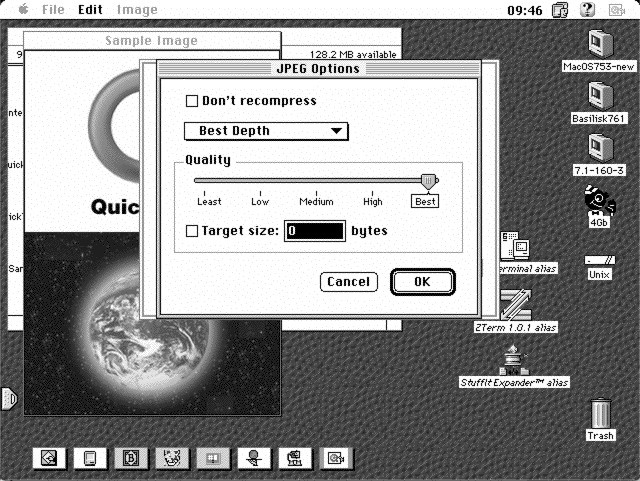
We can also set the Jpeg compression with the options button :

(click to enlarge)
Once done, hit OK, and save the image in the QuickTime Folder.
All this was to set the Picture Viewer application preferences to export any image to jpeg by default. Otherwise it would export to BMP by default.
AppleScript
Now let’s do the AppleScript script that will trigger the screenshots —> go to your AppleScript folder, and launch the application. Following is the script that does the magic. Download it from here. This is what it looks like:

(click to enlarge)
In summary, what it does :
- asks KeyQuencer to do the screenshot shortcut for us (Cmd-Shift-3),
- renames the default "Picture-x" image to "Screen-hour/min/sec". (I tried having it renamed with the all date and hour, but couldn't have the months working, got a "can't set the month as string" error or something...
But still having each images with different names works for me, as I would seldom do a screenshot at the exact time of the day each day).
- It opens the "Screen-hour/min/sec" image in the MacHD with Picture Viewer.
- export it as jpeg format to the Quicktime Folder.
- move that "Screen-hour/min/sec.jpg" to the Images folder of MacHD.
- move the original "Screen-hour/min/sec" in pict format from the MacHD to the trash.
- and optionally empty the trash.
The commands are more detailed in the comments of the script. Of course we can change things, like the place where we want the jpeg screenshot to be saved eventually.
Also, we might want to tweak the delays between the opening and the export of the image. That is the "timeout" command - it is set to 20s in the script above.
Also consider adjusting the delay between the export of the image and the command to quit the Picture Viewer application. On a relatively slow system on which I’ve tested it, it can take 1 - 2 seconds for Picture Viewer to do its thing, so a delay is needed before the quit command.
I found that "with timeout of 60 * minutes seconds" would work for me. On faster systems the delay could perhaps be shortened. I recommend making tests to see what delay works with your system.
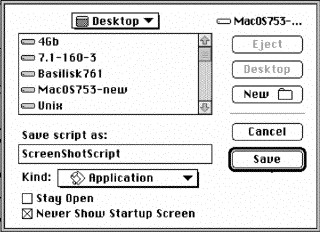
Next we save the script as an application, anywhere we want, with a obvious name like "ScreenShotScript". Make sure to check the "Never Show Startup Screen" box, and leave the "Stay open" box unchecked as here:
ToolDaemon
Okay... now we have our screenshots saved with unique names as jpeg and placed where we want them. But how to run the whole thing remotely?
While Mac OS is known to be different from Unix/Linux and Windows being a graphic interface only system, a little known fact is that there is a way to interact with a Mac OS system using the MPW (Macintosh Programmer Workshop) shell command tools.
These tools permit all the usual things one can do in command line in Unix or Windows, like copy/move/rename files, shutdown/reboot the system, launch programs... etc. And of course programming, as MPW is above all a programming tool.
And here comes the gem called ToolDaemon. Written by F.Blondiau. It is a Telnet server on which one can log and interact with the system, using the aforementioned MPW shell commands.
Now I’ll insert the usual warning about Telnet. It is insecure, everything is sent in clear text (password for login included). Better use this on our private LAN only. Although one might argue in favor of the "security through obscurity" concept. Even if a hacking bot would manage to log onto our ToolDaemon Telnet server, I highly doubt it could comprehend anything going on with the MPW command lines. But who knows, better safe than sorry.
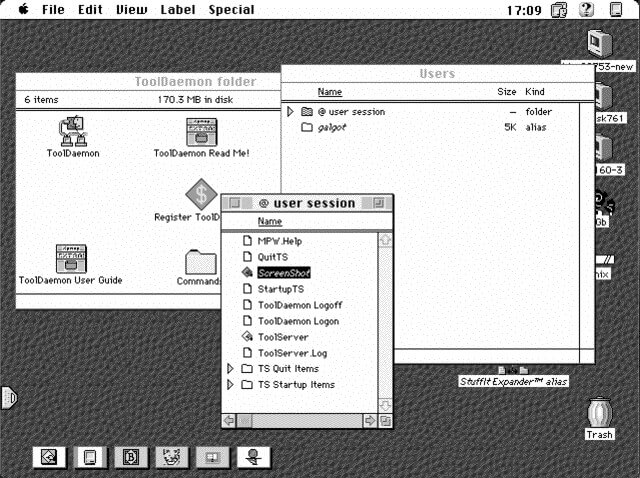
Installing ToolDaemon is pretty straightforward and needs no reboot. After the install go to the new “ToolDaemon folder“ on our HDD. It contains the ToolDaemon server application, and a “Users“ folder. Before anything, open that folder :

(click to enlarge)
In there is a “@ user session“ folder. Let’s do an alias of this folder and rename it with the same user name we use in the Sharing Setup control panel of the system. In that control panel, we also assign a password and a name to the machine. If not done yet. The ToolDaemon telnet server will use the name and password as credentials for the login.
After this is done, let’s open our ToolDaemon user folder alias (renamed galgot on the example above), and place in there an alias of the ScreenShot script we’ve made earlier.

(click to enlarge)
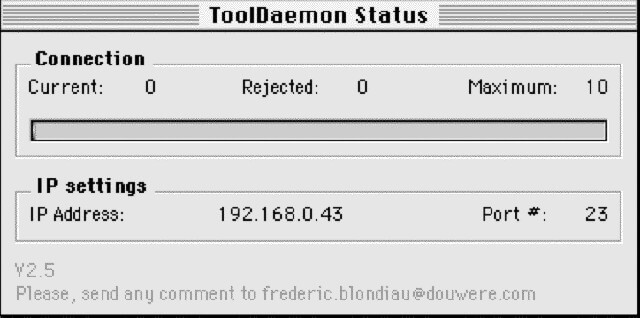
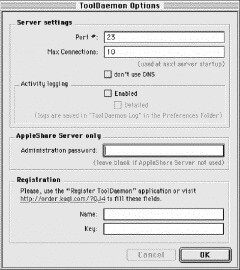
Now we can launch ToolDaemon. This is what the start window looks like. One can change the listening port, set the maximum allowed users, enable activity logging. And also use another password than the default system Sharing Setup, but we’ll leave that blank as we will use the Sharing Setup Password in this example.
(click to enlarge)
When all done click Ok. The server is running and shows us a status window:

(click to enlarge)
We are now ready to connect. Let’s stay stylish and use MacSSH on a PowerBook G3 Wallstreet to connect to it. We can make a new favorite in MacSSH, in the General tab enter the server name (“Alias“), then the server IP address (“Host Name“...not very explicit), and set the port to 23 (Telnet).
In the security tab we set the protocol to Telnet, and we can enter our login and password but the server will always ask for the login and password at connect time anyway ...

(click to enlarge)
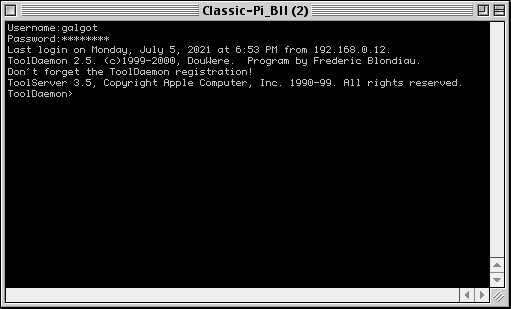
Here we go, we are logged on the ToolDaemon Telnet server. Remember, the login and password to use are the ones we’ve entered in the Sharing Setup control panel of the System 7 remote machine previously.
We can enter commands at the prompt just like any connections via Telnet or SSH. Only the command syntax isn't the same as on Unix / Linux or Windows. For example , if we want to list the files present in the directory when we’ve just logged on, we would type :
files
that is the equivalent to ls in Linux/Unix.
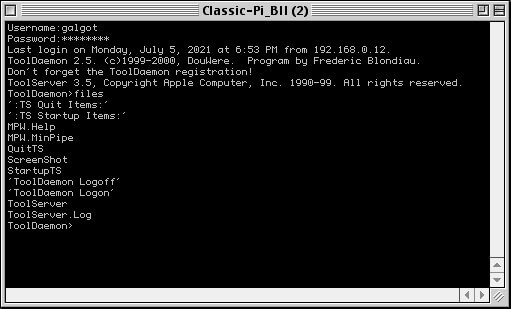
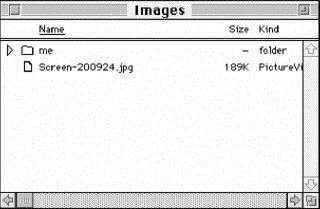
And the result :

(click to enlarge)
As you can see, all the files and folders present in our “@ user session“ are listed, and we can notice the “ScreenShot" alias of the AppleScript script we’ve placed there before.
Applications or scripts can be launched just by typing their names, in that case let’s do a screenshot to see the result of our hard work, by typing :
ScreenShot
And our screenshot script should do his magic on the remote machine. We should see the whole process on the remote screen machine. Note it will take a few seconds as metioned before.
And in the end we have our screenshot available in the Images folder. So this is how to do screenshots on a remote System 7 Macintosh via command line.
There certainly must be better ways, and I encourage more knowledgeable users to point out any ways to make that more efficient.
Edit: Since I’ve setup this I found out there was some SnapzPro versions that can take a screenshot and save it anywhere. So it’s certainly possible to make that script without the need of using PictureViewer.
But anyway, it was a fun learning experience for me, and all this can be modified to do a whole lots of other things.
Author: galgot 


Copyright 2026 System7Today.com
.
The Apple Logo, Macintosh, Mac OS, and others property of Apple Computer, Inc.
This site is in no way affiliated with Apple Computer, Inc. |